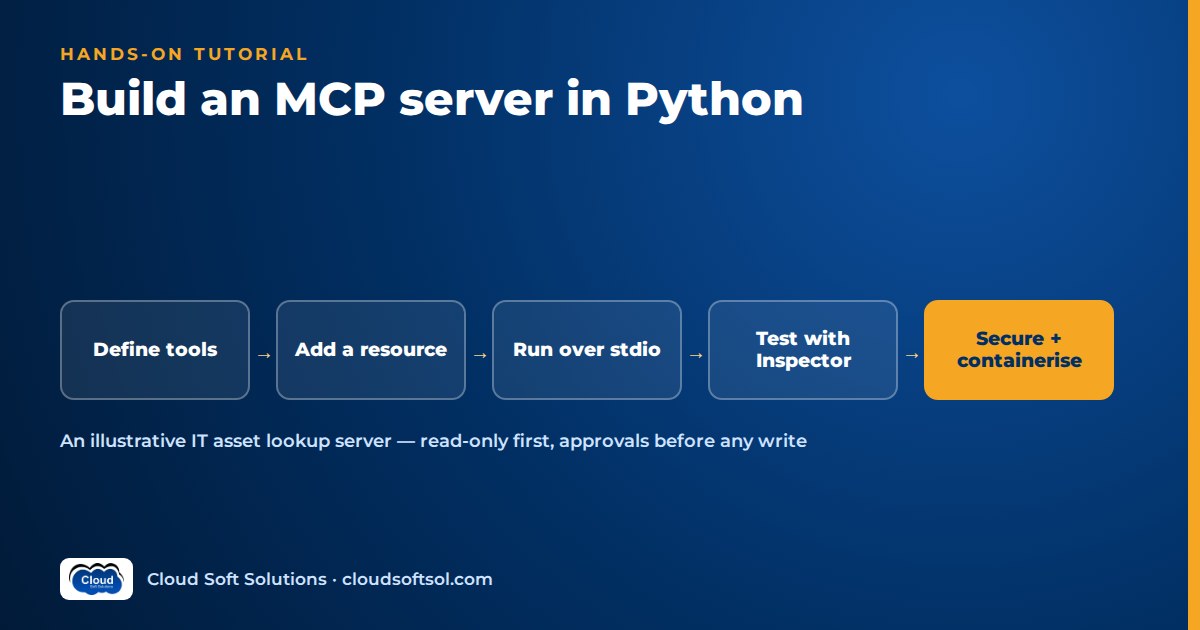
An MCP server is a small program that exposes tools, resources and prompts to AI applications over the Model Context Protocol. To build an MCP server in Python, you install the official MCP Python SDK, register plain Python functions as tools with a decorator, and run the server over stdio for local hosts or streamable HTTP for remote ones. This tutorial builds an illustrative "IT asset lookup" server, then covers what matters in an enterprise: validation, errors, logging, auth, approvals, testing and Docker.
New to the protocol? Read What Is MCP? for hosts, clients and servers, and MCP vs API for why an MCP server usually wraps an existing API. This article stays hands-on.
What you will build
Consider a GCC IT team in Hyderabad supporting thousands of laptops. Service desk agents keep asking who owns a device, whether it is under warranty and what is assigned to an employee. The team wants its internal AI assistant to answer from the asset database, with no way to change records.
| MCP primitive | Name | Purpose |
|---|---|---|
| Tool (read-only) | get_asset | Look up one device by asset tag |
| Tool (read-only) | search_assets_by_owner | List an owner's devices, with validated input |
| Resource | policy://asset-handling | The asset handling policy as Markdown |
| Prompt | device_status_summary | A reusable status-update template |
 AI host (chat app, IDE, agent)
        |
   MCP client
        |  stdio or streamable HTTP
        v
 it-assets MCP server (Python)
        |  read-only SQL
        v
 assets.db (SQLite, demo data)
Step 1: Set up the project and the SDK
You need Python 3.10 or newer and comfort with virtual environments, type hints and decorators; Python for AI engineers covers that subset.
mkdir it-assets-mcp && cd it-assets-mcp
python3 -m venv .venv
source .venv/bin/activate
# "cli" adds the mcp command (run, dev)
pip install "mcp[cli]"
A note on FastMCP and SDK versions
Most tutorials use FastMCP, the high-level server class in version 1 of the official SDK. In the version 2 line, which a plain pip install mcp gives you at the time of writing, the same class is called MCPServer. A separate community package, fastmcp, is a different project with its own API.
# Official SDK, version 2 line (this tutorial)
from mcp.server.mcpserver import MCPServer

# Official SDK, version 1 line (older tutorials)
from mcp.server.fastmcp import FastMCP
The decorators are the same in both. Version 1 used camelCase fields (readOnlyHint, isError); version 2 uses snake_case (read_only_hint, is_error), and HTTP host and port moved from the constructor to run(). The API may change, so check the current SDK README and migration guide before copying code, and pin the version you tested in your requirements.txt.
Step 2: Create demo data
Using SQLite rather than a dict lets the server open the data read-only, a useful habit. Run this once:
"""Create a small demo asset database (fake data)."""
import sqlite3

ROWS = [
    ("LAP-10421", "laptop", "Dell Latitude", "priya.k",
     "in_use", "2027-03-31"),
    ("LAP-10422", "laptop", "Lenovo ThinkPad", "arjun.m",
     "in_repair", "2026-12-31"),
    ("MON-20077", "monitor", "LG 27in", "priya.k",
     "in_use", "2028-01-15"),
]

conn = sqlite3.connect("assets.db")
conn.execute(
    "CREATE TABLE IF NOT EXISTS assets (tag TEXT PRIMARY KEY,"
    " type TEXT, model TEXT, owner TEXT, status TEXT,"
    " warranty_end TEXT)"
)
conn.executemany(
    "INSERT OR REPLACE INTO assets VALUES (?,?,?,?,?,?)", ROWS
)
conn.commit()
conn.close()
Step 3: The server skeleton
Create server.py with logging, the server object, a Pydantic model for structured output and a read-only query helper.
"""IT asset lookup MCP server (illustrative)."""
import logging
import re
import sqlite3
import sys
from contextlib import closing
from pathlib import Path
from typing import Annotated

from pydantic import BaseModel, Field
from mcp.server.mcpserver import MCPServer
from mcp.server.mcpserver.exceptions import ToolError
from mcp.types import ToolAnnotations

# Log to stderr. On stdio, stdout carries protocol messages.
logging.basicConfig(stream=sys.stderr, level=logging.INFO)
log = logging.getLogger("it-assets")

DB_PATH = Path(__file__).with_name("assets.db")
TAG_RE = re.compile(r"^[A-Z]{2,4}-\d{4,6}$")
READ_ONLY = ToolAnnotations(read_only_hint=True)

mcp = MCPServer("it-assets")
class Asset(BaseModel):
    tag: str
    type: str
    model: str
    owner: str
    status: str
    warranty_end: str


def query(sql: str, params: tuple) -> list[dict]:
    """Run a parameterised, read-only query."""
    # mode=ro: SQLite refuses writes on this connection.
    uri = f"file:{DB_PATH}?mode=ro"
    with closing(sqlite3.connect(uri, uri=True)) as conn:
        conn.row_factory = sqlite3.Row
        rows = conn.execute(sql, params).fetchall()
    return [dict(r) for r in rows]
Logging goes to stderr because, on stdio, stdout carries the JSON-RPC messages; a stray print() corrupts the stream. The ?mode=ro URI makes SQLite reject writes, so even a bug cannot modify data. In production, use a read-only database role or API scope.
Step 4: A read-only lookup tool
A tool is a typed Python function with a docstring. The SDK turns the name, docstring and parameter types into the tool definition models read, the same idea as provider function calling and structured outputs.
@mcp.tool(annotations=READ_ONLY)
def get_asset(asset_tag: str) -> Asset:
    """Look up one IT asset by its tag, e.g. LAP-10421.

    Returns type, model, owner, status and warranty end.
    """
    tag = asset_tag.strip().upper()
    if not TAG_RE.match(tag):
        # ToolError text goes back to the model as is_error.
        raise ToolError("Asset tag must look like LAP-10421.")
    rows = query("SELECT * FROM assets WHERE tag = ?", (tag,))
    if not rows:
        raise ToolError(f"No asset found with tag {tag}.")
    log.info("get_asset tag=%s", tag)
    return Asset(**rows[0])
Returning a Pydantic model makes the SDK publish an output schema and return structured content, which code can parse reliably. read_only_hint tells hosts the tool changes nothing; it is a hint, and the read-only connection is the enforcement. Write the docstring for the model; vague descriptions cause wrong tool choices.
Step 5: A search tool with input validation
This tool takes free text from the model, so it validates harder. Field constraints inside Annotated appear in the published JSON Schema, and the SDK validates arguments before your function runs.
@mcp.tool(annotations=READ_ONLY)
def search_assets_by_owner(
    owner: Annotated[str, Field(
        min_length=3, max_length=64,
        pattern=r"^[a-z0-9._-]+$",
        description="Owner username, e.g. priya.k",
    )],
    limit: Annotated[int, Field(ge=1, le=25)] = 10,
) -> list[dict]:
    """List assets assigned to one owner (max 25)."""
    rows = query(
        "SELECT tag, type, model, status FROM assets"
        " WHERE owner = ? ORDER BY tag LIMIT ?",
        (owner, limit),
    )
    log.info("search owner=%s hits=%d", owner, len(rows))
    return rows
The pattern rejects injection-shaped input before it reaches SQL (the query is parameterised anyway; defence in depth is cheap), and the limit bound stops the model pulling the whole table into its context window.
Step 6: Add a resource and a prompt
Resources are read-only context identified by a URI. Prompts are reusable templates users pick, often as slash commands.
POLICY = """# IT Asset Handling Policy (sample)
1. Never share an asset's serial number outside IT.
2. Reassignments need a ticket and manager approval.
3. Lost devices must be reported within one hour.
"""


@mcp.resource(
    "policy://asset-handling",
    name="asset_handling_policy",
    mime_type="text/markdown",
)
def asset_policy() -> str:
    """The IT asset handling policy, as Markdown."""
    return POLICY


@mcp.prompt()
def device_status_summary(asset_tag: str) -> str:
    """Draft a status update for a user about their device."""
    return (
        f"Use get_asset to look up {asset_tag}. Then write a "
        "short, polite status update for the device owner. "
        "Follow the asset handling policy. Do not reveal "
        "serial numbers. If the asset is not found, say so."
    )
Policies and runbooks belong in resources, loaded when the host decides. The prompt bakes in safe wording for every user.
Step 7: Run it over stdio and streamable HTTP
Finish server.py with an entry point. With no arguments, run() uses stdio: the host launches the server as a subprocess.
if __name__ == "__main__":
    # Default transport is stdio (local hosts launch it).
    mcp.run()
For remote use, run the same server over streamable HTTP from a second entry file:
"""Run the same server over streamable HTTP."""
import os

from server import mcp

if __name__ == "__main__":
    mcp.run(
        transport="streamable-http",
        # 127.0.0.1 locally; 0.0.0.0 only inside a container
        host=os.getenv("MCP_HOST", "127.0.0.1"),
        port=int(os.getenv("MCP_PORT", "8000")),
    )
The endpoint is served at /mcp by default, for example http://127.0.0.1:8000/mcp. You can also run mcp run server.py --transport streamable-http. Use stdio for one user's desktop or IDE, and HTTP when many users or agents share a server, which is when auth becomes mandatory.
Step 8: Connect it to an MCP host
Each host (desktop chat app, IDE assistant, agent framework) has its own configuration, so check its documentation. For stdio you give a command; for HTTP, a URL. Many hosts accept JSON like this:
{
  "mcpServers": {
    "it-assets": {
      "command": "/path/to/.venv/bin/python",
      "args": ["/path/to/it-assets-mcp/server.py"]
    }
  }
}
Use absolute paths and the virtual environment's Python. After a restart the host lists your tools, resource and prompt. Ask "who owns LAP-10421 and is it under warranty?" and watch it call get_asset.
Building the server is the easy part; wiring it into a customer's ITSM, identity and approval flows is where enterprise projects succeed or stall. Cloudsoft's FDE PRO program includes a "ServiceNow AI Agent via MCP" project that takes this pattern from local demo to a deployed, observable service.
Step 9: Test it, in code and with the MCP Inspector
Test the server before connecting a model, so any failure is clearly yours. The version 2 SDK's Client can connect to an MCPServer in-process:
"""In-memory tests: no subprocess, no network."""
import asyncio

from mcp import Client
from server import mcp


async def main() -> None:
    async with Client(mcp) as client:
        tools = await client.list_tools()
        assert len(tools.tools) == 2

        ok = await client.call_tool(
            "get_asset", {"asset_tag": "lap-10421"})
        assert not ok.is_error
        assert ok.structured_content["owner"] == "priya.k"

        bad = await client.call_tool(
            "search_assets_by_owner", {"owner": "x' OR 1=1"})
        assert bad.is_error  # rejected by the schema

        res = await client.read_resource(
            "policy://asset-handling")
        assert "Policy" in res.contents[0].text
    print("all checks passed")
Add a valid, not-found and invalid case per tool and run them in CI. Client also accepts a URL or stdio launch parameters, so the same tests can hit a running container.
For manual checks, the MCP Inspector is a browser tool that lists your primitives and lets you call them:
# Via the SDK CLI (needs uv and Node.js)
mcp dev server.py

# Or run it directly; connect to your command
# (stdio) or http://127.0.0.1:8000/mcp (HTTP)
npx @modelcontextprotocol/inspector
Then test tool selection with a model: realistic questions and the tool you expect for each.
Error handling and logging
- Anticipated errors. Raise
ToolErrorwith a message written for the model, asget_assetdoes. The call returns withis_errorset, so the model can correct itself or tell the user. - Unexpected errors. Other exceptions are treated as crashes: the model sees only a generic "error executing tool" message and the server logs the traceback. No stack traces or connection strings leak into the conversation.
- Invalid arguments. Rejected before your code runs, with a validation message.
Log with the standard logging module to stderr, and in production emit structured JSON: tool name, correlation ID, caller identity, latency and outcome, but not result payloads containing personal data. The SDK also includes OpenTelemetry support for tracing calls end to end; see AI observability. MCP's protocol-level logging to clients has changed across protocol revisions, so check the current SDK README before relying on it.
Adding auth for remote HTTP
A stdio server inherits the trust of the local user. An HTTP server is a network service: anyone who can reach it can call its tools unless you add authentication.
The MCP specification defines OAuth-based authorisation for HTTP transports. Broadly, your server acts as an OAuth resource server: it advertises which authorisation server it trusts (your identity provider, such as Microsoft Entra ID), clients send an access token as a bearer token, and the server validates its audience and scopes before running a tool. The Python SDK provides hooks for this, such as a token verifier passed with auth settings; names have changed between releases, so follow the current SDK README for the wiring.
- Map scopes to tools: a read scope for lookups, and no write scope until approvals exist.
- Prefer acting on behalf of the signed-in user, so the backend enforces their permissions.
- Never pass the client's token straight through to downstream APIs.
- Bind to 127.0.0.1 in development; in production sit behind TLS and a gateway.
AI agent identity and access goes deeper on delegated access and token exchange.
Do not expose write tools without approval
Once a tool can reassign a laptop or disable an account, a prompt injection hidden in a ticket note becomes an action in a real system. Host "allow this tool?" prompts are not an approval workflow; users click through them. A safer first step is a tool that proposes rather than performs:
PROPOSE = ToolAnnotations(
    read_only_hint=False, destructive_hint=False)


@mcp.tool(annotations=PROPOSE)
def propose_reassignment(
    asset_tag: str, new_owner: str, reason: str
) -> dict:
    """Draft an asset reassignment for human approval.

    This does NOT change the asset. It returns a draft
    that a person approves in the ITSM tool, which then
    performs the change under its own audit trail.
    """
    return {
        "action": "reassign_asset",
        "asset_tag": asset_tag.strip().upper(),
        "new_owner": new_owner,
        "reason": reason,
        "status": "pending_approval",
    }
A named person approves the change in the system of record, which executes it with its own audit trail. When you add real write tools, require explicit approval, tight scopes, idempotency and logging of the approver. See human-in-the-loop AI for patterns.
Package it in Docker
For a shared HTTP deployment, add a requirements.txt pinning the SDK version you tested, then:
FROM python:3.12-slim
WORKDIR /app
# Run as a non-root user
RUN useradd --create-home appuser
COPY requirements.txt .
RUN pip install --no-cache-dir -r requirements.txt
COPY server.py http_server.py assets.db ./
USER appuser
ENV MCP_HOST=0.0.0.0 MCP_PORT=8000
EXPOSE 8000
CMD ["python", "http_server.py"]
docker build -t it-assets-mcp .
# Publish only on localhost while testing
docker run --rm -p 127.0.0.1:8000:8000 it-assets-mcp
The server binds to 0.0.0.0 inside the container so Docker can route to it; the -p 127.0.0.1:... flag keeps it off your network until auth is in place. Real backend credentials come from a secrets manager at runtime, never the image. For multi-stage builds, health checks and scanning, see Docker for AI applications.
MCP server security checklist
| Area | Check |
|---|---|
| Scope | Only the tools the use case needs; read-only by default |
| Backend access | Read-only role or API scope; no shared admin keys |
| Input | Typed parameters, patterns, bounds; parameterised queries |
| Output | Only needed fields; no secrets or unnecessary personal data |
| Transport and auth | stdio locally; HTTP only with TLS and validated OAuth tokens |
| Writes | Propose, then a named human approves in the system of record |
| Errors and logs | ToolError for expected cases; structured logs without sensitive payloads |
| Supply chain | Pinned dependencies; scanned image; non-root user |
| Prompt injection | Treat backend text such as ticket notes as data, not instructions |
From this demo to an enterprise server
Moving this server into a real environment changes the backend and controls, not the structure: SQLite becomes a CMDB or ITSM API, the read-only connection a scoped service identity, the log line a trace, and the propose tool feeds a real change workflow. That is the step from AI demo to enterprise outcome. The ServiceNow AI agent project walks through that larger build: triage, knowledge retrieval, an MCP server in front of ServiceNow, approvals and evaluation.
Frequently asked questions
Is FastMCP the same as the MCP Python SDK?
FastMCP was the high-level server class in version 1 of the official MCP Python SDK. In the version 2 line it is called MCPServer and imported from mcp.server.mcpserver. A separate community package named fastmcp has its own API, so check which one a tutorial uses.
Should I use stdio or streamable HTTP for an MCP server?
Use stdio when one user runs the server locally from a desktop app or IDE. Use streamable HTTP when many users or agents share a deployed server, and add TLS and authentication.
Do I need an LLM API key to build an MCP server?
No. The server never calls a model; the host does. You can build and test the whole server with in-process tests and the MCP Inspector.
Why does my stdio MCP server break when I use print?
On stdio, stdout carries the protocol messages, so extra output corrupts the stream. Send logs to stderr with the logging module.
How do I stop the model from sending bad input to a tool?
Use precise type hints and Pydantic Field constraints such as patterns, lengths and bounds. The SDK validates arguments against them before your function runs. Keep parameterised queries and backend permissions as further layers.
Can an MCP server write to ServiceNow or a CMDB?
Yes, but start read-only. If changes are needed, expose a tool that proposes the change and let a named person approve it in the system of record, which performs it with its own audit trail.
Will this code keep working as the MCP SDK changes?
Not necessarily. Names have already changed between major versions. Pin the version you tested, read the migration guide before upgrading and rerun your tests afterwards.
Want to build MCP servers against real enterprise systems, with ServiceNow, Entra ID, Docker and Kubernetes in the loop? Explore Cloudsoft's AI Forward Deployed Engineer course, FDE PRO, whose ServiceNow AI Agent via MCP project extends what you built here. Classes run in Ameerpet, beside Ameerpet Metro, or live online; call +91 96660 19191 for a free demo.